


Fun with UTEE
I took a class last week at my local scrapbook store, Anthologies, on different techniques for using ultra thick embossing enamel (UTEE). I have a large bottle of UTEE and have used it once. This class taught all sorts of uses for the stuff. Here are photos of the little things we made. CAUTION: I attached these to tags when I got home and made up my own descriptions for them. They are not "technical" terms by any means.
All techniques were done a heat resistant non-stick craft sheet.
Our first technique was to coat a piece of chipboard with a few coats of heated and layered UTEE and then use a rubber stamp to impress an image into the still-warm UTEE. After it cooled a little, I rubbed some Perfect Pearls onto the image.

Next, we cut out an image printed onto ordinary printer paper and adhered it to a piece of chipboard. We then applied several coats of melted and layered UTEE to achieve a smooth, glassy surface.

This is a very similar technique to the one above. We stamped an image onto cardstock using Staz On ink, then applied several coats of UTEE. Then we put the stamped and glassy heart in the freezer. After about 20 minutes, we took them out and bent the paper until the UTEE cracked.

This next item is one of my favorite techniques. The instructor called it "cloisonne UTEE." Again, several coats of UTEE melted and layered to get a glassy surface. Then I put a couple of colors of Perfect Pearls onto the warm surface. Then I heated the UTEE again and while it was still warm, used a swirly pattern rubber stamp with gold pigment ink to stamp into the UTEE. I heated this once agian to smooth out the UTEE and blend the stamped image a little.

For the rest of the projects, we used a Melting Pot to melt UTEE and pour it. This was messy, and I knew I'd make a mess with it.
The instructor had flexible molds, some purchased and some she made with Mold and Pour. We poured the melted UTEE into the molds and let them cool. Of course, I over poured and had a messy glob of UTEE on the side of the molds, so my molded UTEE does not look as good as it could.

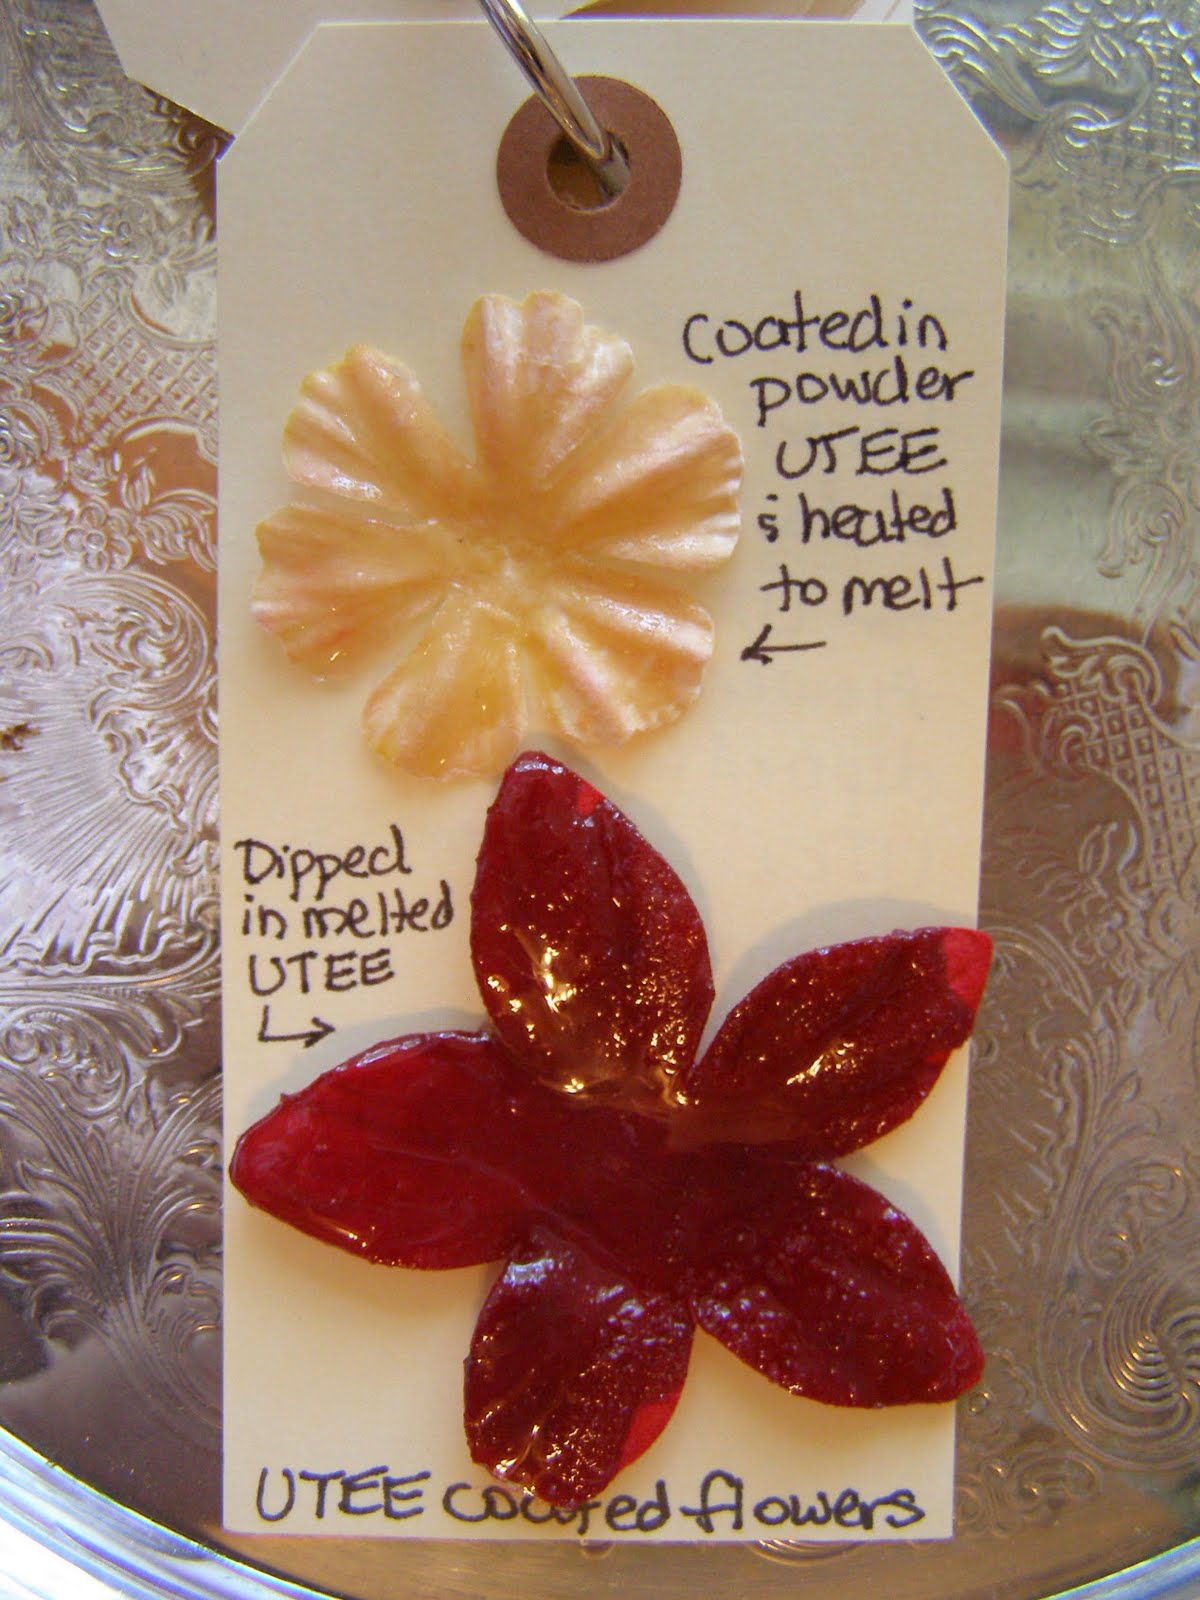
This next one was my least favorite technique. We applied UTEE to paper or silk flowers. We dipped a flower into the melted UTEE (the large red flower). We also tried the technique by applying powdered UTEE (from the bottle) onto the flower and heated to melt (the small white flower). I thought the dipped flower was a mess and didn't turn out well at all. I didn't like this technique, don't like the way it looks, and don't see why I would ever need UTEE-coated flowers. But, several others in the class really liked it.
We also used UTEE for image transfer. This was a really cool technique. We cut out an image printed onto ordinary printer/copier paper, and then poured the melted UTEE onto it. After it was completely cooled, I soaked it in water to dissolve the paper. I had to "scrub" it off a little, but now I'm left with a transparent image transfer. How cool is that?!

This was another favorite technique. We had a printed image down on our craft matt. Placed a small cookie cutter over the image, and then poured the melted UTEE into the cookie cutter. Let cool, and then pick up the cookie cutter. By this time, the UTEE in the Melting Pot was turning yellow from being heated too long, which is why my charm is not clear (like UTEE should be).

Finally, I thought this technique was awesome. We made faux soldered charms using UTEE as the "solder". We took a printed image and sandwiched it between two 1"x3" glass slides. We dipped each edge into the melted UTEE and let cool. Then we painted over the dried UTEE with a silver paint pen.

I learned a lot of really cool techniques, and also some things that I wouldn't attempt again. I plan to put my UTEE to use soon!
posted by Erica | 6:00 AM
![]()
![]()
5 Comments:
So many cool techniques..........gosh, which one to try first? I love the image transfer! I will have to try that soon!! What a fun class!
That must have been a very interesting class, I like how you made a tag book with all the techniques you learned =D
Eric, this was a wealth of information! How cool is that stuff! The wheels in my head are a turnin! Now, where do I get this stuff? Anthologies?
Great Post! Hey are you going to Waxahachie for the the Paper Cowgirl Retreat Vendor night on Saturday? I'll be setting up for vendor night. You should come, I know you'd love it!
Maureen
Oops, I should proof read before I post Erica! Come see me sometime!
Maureen
Wow, how cool is that! Love all the displayed pieces. I will have to try that also. Love especially the image transfer technique. Thanks for the instructions!
Post a Comment
Subscribe to Post Comments [Atom]
<< Home